How to Build a Real-Time Image Classification Model on STM32 with CMSIS-DSP
Running Image Classification on an STM32 with CMSIS-NN
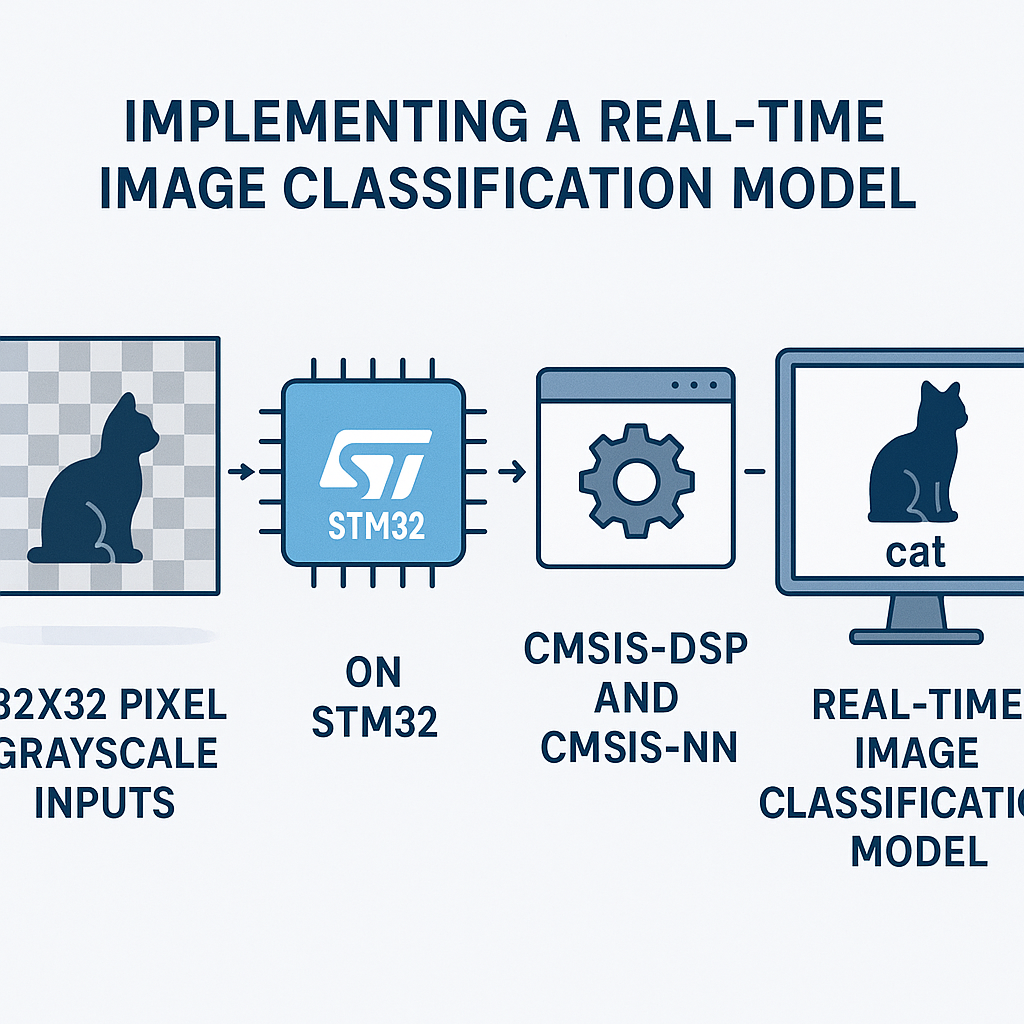
Running a neural network on a microcontroller sounds like overkill until you actually need it—think quality inspection on a production line, gesture recognition, or wildlife monitoring in a spot where there's no cloud connection. An STM32F4 with 192 KB of SRAM and CMSIS-NN can run a small convolutional network on 32x32 grayscale images at usable frame rates. It won't match a desktop GPU, but for binary or few-class classification, it works surprisingly well.
This guide walks through the full pipeline: capturing an image, preprocessing it, running inference with CMSIS-NN, and reading the result. The tricky part isn't the math—CMSIS-NN handles that—it's getting the data formats right and fitting everything in memory.
Prerequisites
- Solid C skills (you'll be working with raw buffers and pointer math)
- Familiarity with STM32 peripherals, especially DCMI or SPI for camera interfacing
- Basic understanding of CNNs—you don't need to derive backpropagation, but you should know what convolution layers, pooling, and fully connected layers do
- STM32CubeIDE v1.16+ set up with a working project
- CMSIS-NN library (included in the CMSIS v6 pack, or grab it from the ARM-software/CMSIS-NN GitHub repo)
Parts and Tools
- STM32F4 or STM32H7 board—the H7 series gives you more RAM and a faster core, which matters for image workloads. An STM32F446RE or STM32H743 Nucleo works well.
- Camera module—OV7670 (parallel, cheap but finicky) or OV2640 with SPI/DCMI interface
- STM32CubeIDE v1.16+
- Python environment with TensorFlow/Keras for training and model conversion
- USB cable for programming and debug output
Steps
- Train and Convert Your Model (Off-Device)
Start on your PC, not the MCU. Train a small CNN in TensorFlow/Keras on 32x32 grayscale images. Keep it minimal—two conv layers, max pooling, one dense layer. Something like this:
# Python - training side
model = tf.keras.Sequential([
    tf.keras.layers.Conv2D(8, (3,3), activation='relu', input_shape=(32,32,1)),
    tf.keras.layers.MaxPooling2D((2,2)),
    tf.keras.layers.Conv2D(16, (3,3), activation='relu'),
    tf.keras.layers.MaxPooling2D((2,2)),
    tf.keras.layers.Flatten(),
    tf.keras.layers.Dense(32, activation='relu'),
    tf.keras.layers.Dense(NUM_CLASSES, activation='softmax')
])
After training, quantize the model to int8 using TensorFlow Lite's post-training quantization. This is non-negotiable for MCU deployment—floating-point inference on a Cortex-M4 is painfully slow and eats memory. The quantized TFLite model then gets converted to C arrays using
xxdor thetflite_microtools, producing weight and bias arrays that CMSIS-NN can consume directly. - Set Up CMSIS-NN in Your STM32 Project
- Download the CMSIS-NN library from
github.com/ARM-software/CMSIS-NN. It's also bundled in the CMSIS v6 pack if you prefer the pack manager approach. - Add the CMSIS-NN source files and include paths to your STM32CubeIDE project. You'll primarily use functions from
arm_convolve_s8,arm_max_pool_s8,arm_fully_connected_s8, andarm_softmax_s8. - Make sure CMSIS-DSP is also linked—CMSIS-NN depends on it for some math operations. If you're on a Cortex-M4F or M7, enable the FPU in your project settings.
- Download the CMSIS-NN library from
- Capture and Preprocess the Image
Your camera module outputs raw pixel data. You need to get that into a 32x32 int8 array for CMSIS-NN. The exact capture code depends on your camera interface (DCMI, SPI, or parallel GPIO), but the preprocessing steps are the same:
// Capture and preprocess into CMSIS-NN input format
int8_t input_buffer[32 * 32];  // 1024 bytes for 32x32 grayscale

void PreprocessImage(uint8_t *raw_frame, int raw_w, int raw_h) {
    // 1. Convert to grayscale if needed (skip if camera outputs mono)
    // 2. Downsample to 32x32 using nearest-neighbor or bilinear
    // 3. Normalize and quantize to int8 range [-128, 127]
    for (int y = 0; y < 32; y++) {
        for (int x = 0; x < 32; x++) {
            int src_x = x * raw_w / 32;
            int src_y = y * raw_h / 32;
            uint8_t pixel = raw_frame[src_y * raw_w + src_x];
            input_buffer[y * 32 + x] = (int8_t)(pixel - 128); // Zero-point offset
        }
    }
}
The zero-point offset (subtracting 128) must match what you used during quantization-aware training. If these don't line up, your model will produce garbage outputs even though the code is "correct." This is the number one debugging headache with quantized inference—I've lost hours to mismatched quantization parameters.
- Implement the Inference Pipeline
With CMSIS-NN, you call each layer function explicitly, passing the weights, biases, and quantization parameters you extracted from the TFLite model. Here's the structure:
// Buffers for intermediate results
int8_t conv1_output[16 * 16 * 8];   // After first conv + pool
int8_t conv2_output[6 * 6 * 16];    // After second conv + pool
int8_t fc1_output[32];
int8_t fc2_output[NUM_CLASSES];
int16_t scratch_buffer[512];        // CMSIS-NN scratch space

void RunInference(void) {
    cmsis_nn_context ctx;
    ctx.buf = scratch_buffer;
    ctx.size = sizeof(scratch_buffer);

    // Layer 1: Conv2D 3x3, 8 filters
    cmsis_nn_conv_params conv1_params = { /* stride, padding, activation range, offsets */ };
    cmsis_nn_dims input_dims = {1, 32, 32, 1};
    cmsis_nn_dims conv1_filter_dims = {8, 3, 3, 1};
    cmsis_nn_dims conv1_out_dims = {1, 30, 30, 8};

    arm_convolve_s8(&ctx, &conv1_params, /* quant params */,
                    &input_dims, input_buffer,
                    &conv1_filter_dims, conv1_weights,
                    /* bias_dims */, conv1_bias,
                    &conv1_out_dims, conv1_output);

    // Max Pool 2x2
    cmsis_nn_pool_params pool_params = { .stride = {2, 2}, .padding = {0, 0, 0, 0} };
    arm_max_pool_s8(&ctx, &pool_params, /* dims */, conv1_output, /* out dims */, conv1_output);

    // Layer 2: Conv2D + Pool (similar pattern)
    // ...

    // Fully Connected + Softmax
    arm_fully_connected_s8(&ctx, /* params */, /* dims */,
                           conv2_output, fc1_weights, fc1_bias, fc1_output);
    arm_fully_connected_s8(&ctx, /* params */, /* dims */,
                           fc1_output, fc2_weights, fc2_bias, fc2_output);
    arm_softmax_s8(fc2_output, NUM_CLASSES, 1, /* mult */, /* shift */, /* diff_min */, fc2_output);
}
The scratch buffer size depends on your layer dimensions. CMSIS-NN provides helper functions like
arm_convolve_s8_get_buffer_sizeto calculate the required size at compile time. Always use these instead of guessing—an undersized scratch buffer silently corrupts your results. - Read the Result and Act On It
- After
arm_softmax_s8, the output buffer contains confidence scores for each class in int8 format. - Find the index of the maximum value—that's your predicted class:
int8_t max_val = -128; int predicted_class = 0; for (int i = 0; i < NUM_CLASSES; i++) { if (fc2_output[i] > max_val) { max_val = fc2_output[i]; predicted_class = i; } } // Output or act on predicted_class - After
- Profile and Optimize
Use the DWT cycle counter (available on Cortex-M3/M4/M7) to measure inference time:
CoreCycleCounter_Init();
uint32_t start = DWT->CYCCNT;
RunInference();
uint32_t cycles = DWT->CYCCNT - start;
float ms = (float)cycles / (SystemCoreClock / 1000);
On an STM32F4 at 168 MHz, expect somewhere around 10–50 ms per inference for a small model like this, depending on the number of filters. If it's too slow, reduce filter counts, shrink the input, or move to an STM32H7 at 480 MHz. The H7's tightly-coupled memory (DTCM) also significantly speeds up buffer access.
Troubleshooting
- Model outputs random classes regardless of input: Nine times out of ten, this is a quantization mismatch. Verify that the zero-point and scale values in your CMSIS-NN layer parameters exactly match what TFLite generated. Print them side by side and compare.
- Hard fault during inference: Check buffer sizes. CMSIS-NN writes intermediate results to your output buffers, and if they're undersized, you get memory corruption. Use the CMSIS-NN buffer size helper functions. Also check alignment—some SIMD-accelerated CMSIS-NN functions require 4-byte aligned buffers.
- Out of RAM: A 32x32x8 convolution output is only about 8 KB, but multiple layers stack up fast. Reuse buffers between layers when possible (layer N's input buffer can be reused as layer N+2's output buffer if the dimensions fit). On the H7, place large buffers in external RAM or DTCM.
- Camera image looks corrupted: Camera timing is notoriously picky. If using the OV7670, double-check PCLK polarity, HREF/VSYNC active levels, and the pixel clock frequency. Start by capturing a static test pattern before attempting live classification.
Where to Go From Here
You've got inference running on bare metal, which is a solid foundation. For a more streamlined deployment workflow, look into TensorFlow Lite for Microcontrollers (TFLM)—it handles the layer-by-layer plumbing for you and supports CMSIS-NN acceleration as a backend. The tradeoff is a larger code footprint (~50–100 KB). Another option is STM32Cube.AI, which takes a Keras or ONNX model and auto-generates optimized C code for your specific STM32 target. It's tightly integrated with STM32CubeIDE and often produces smaller, faster code than the generic TFLM runtime.